The Ticket Groups option allows you to group individual ticket types such as Adult, Child etc into a named group which could then be given certain attributes. Initially the main usage for Ticket Groups is to allow you to restrict the number of tickets in a group that can be sold for an event or specific runnings of events.
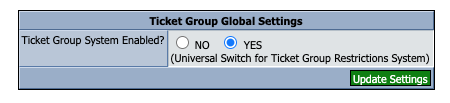
First you need to ensure that the Ticket Groups module is enabled. To do this select Contents from the top menu, then in the left-hand menu under Event Information, select Ticket Groups and ensure this is set to Yes.
 |
 |
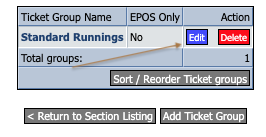
Next we need to setup a group for the event in question. Go to Contents from the top menu and find the event you wish to add groups for. For that event click the Edit Ticket Groups button to either Add or Edit a ticket group.
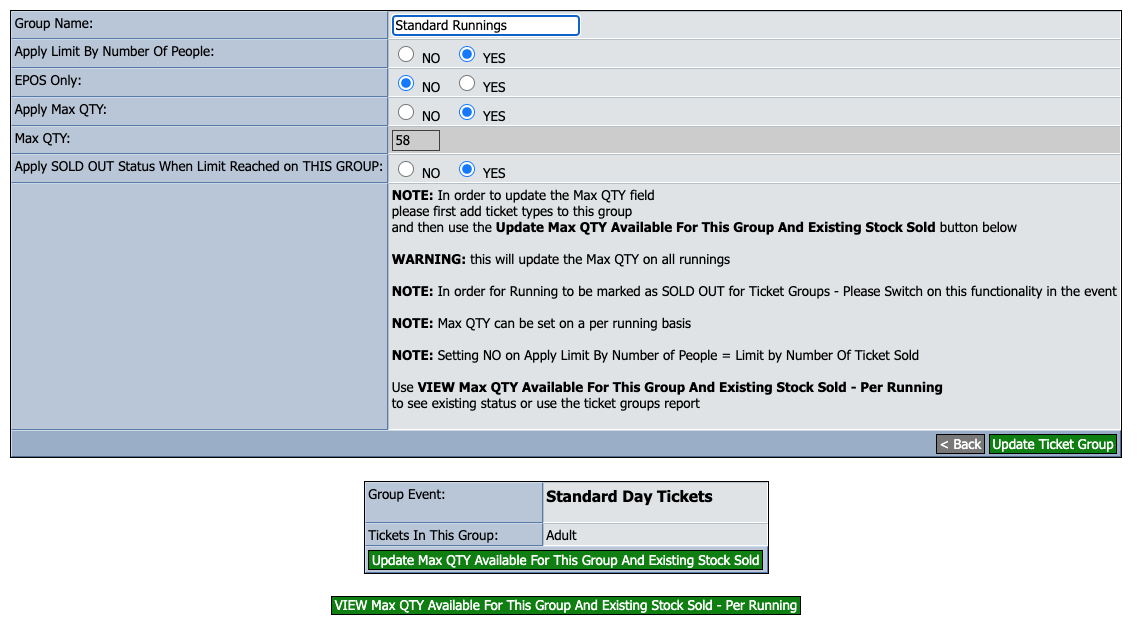
Group Name - The name you wish to call the group
Apply Limit By Number Of People - If you want to restrict the number of tickets sold, select No. However if certain tickets can be for more than one person (e.g. a Family ticket) and you wish to restrict sales to a certain number of passengers, select Yes.
EPOS Only - Applies if you are using vTicket ePOS and wish the group to only apply to the ePOS interface
Apply Max QTY - If you wish to apply a Maximum Quantity that can be sold of this ticket per event running
Max QTY - For the above enter the maximum quantity you wish to be available for each event running
Apply SOLD OUT Status When Limit Reached on THIS GROUP - Regardless of the overall capacity available for an event running, when the Max QTY for this group is reached do you want the entire running to show as sold out (set to Yes) or just the tickets in this particular group (set to No)
Add Ticket Types To Group
At this stage we need to switch to the Edit Ticket Types for the relevant service and add whichever Ticket Types are relevant to the group you have just created.

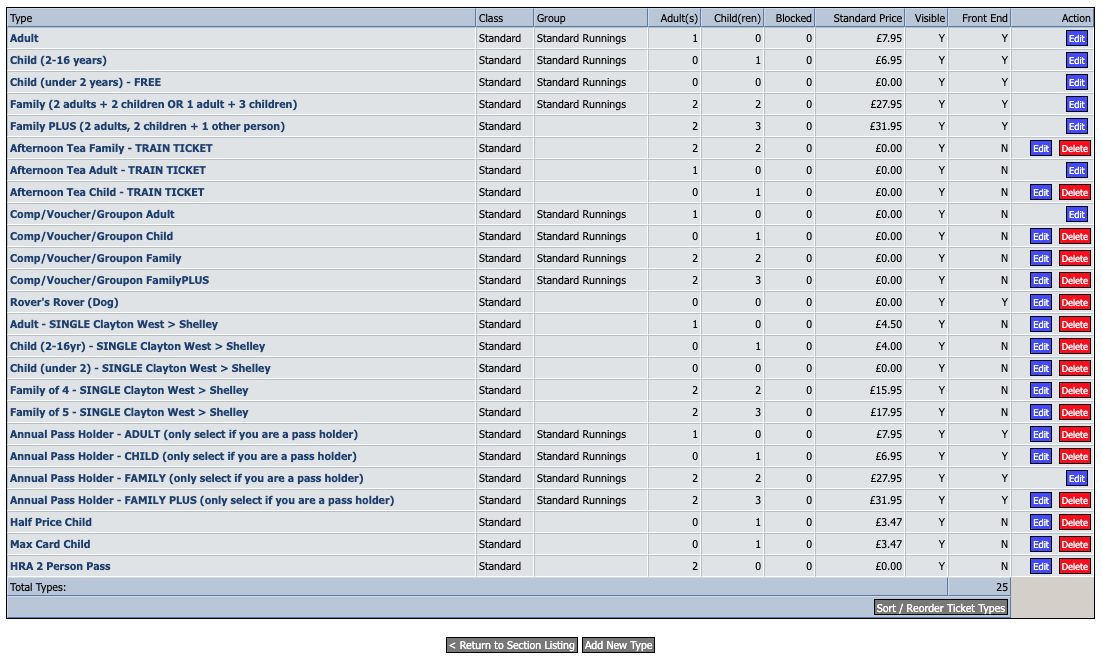
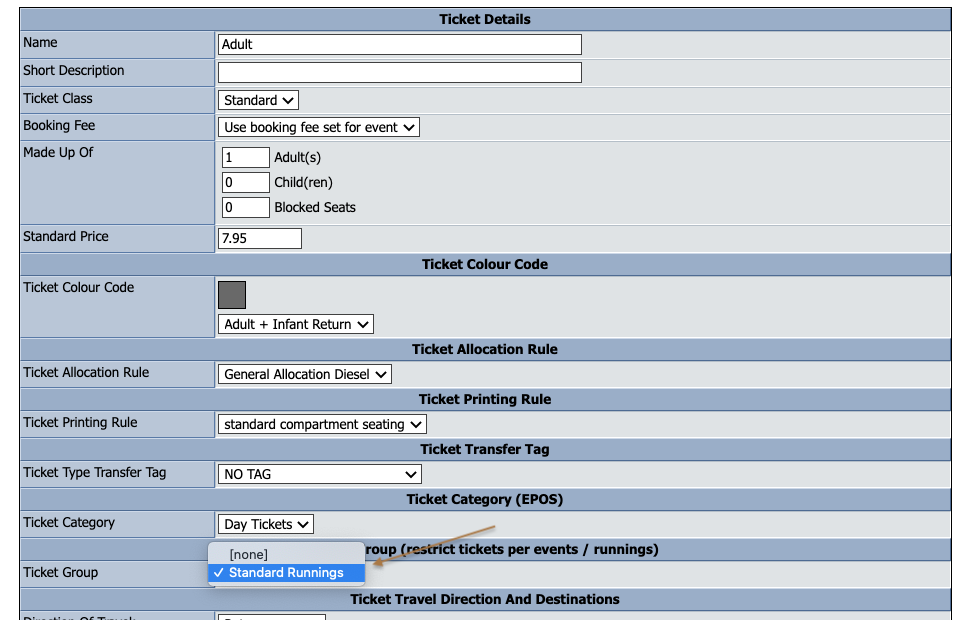
In this example we are assigning Adult ticket type to the group:
Once you have added all the applicable Ticket Types to the group, you can return to Edit Ticket Groups to set the required quantity.
You will note that the system now displays all the ticket types assigned to this group in the lower box.
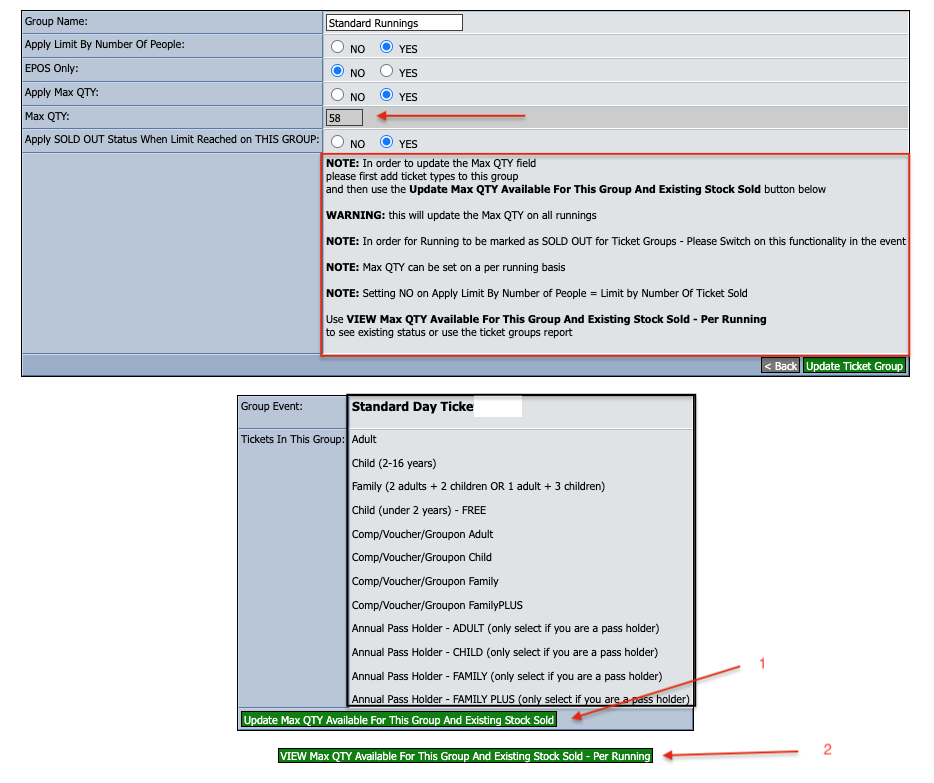
First set the Max QTY required. Do not click Update Ticket Group yet.
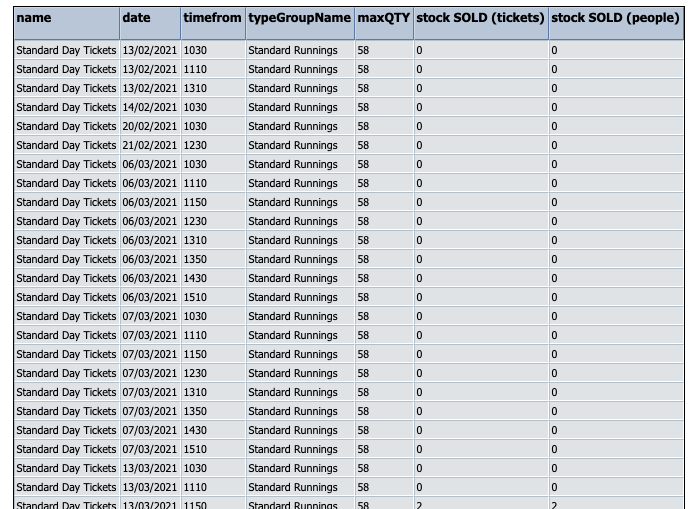
Click Update Max QTY Available For This Group And Existing Stock Sold (1) which will then bring up all the runnings for this event with the details of what has been sold so far (see below).
This action only needs to be performed once unless you want to change the capacity for every running. After that to see the table below you would click on View Max QTY Available For This Group And Existing Stock Sold - Per Running (2)
Now click Update Ticket Group to save changes.